GSES Backhoe 101

WELCOME TO:

G.S.E.S. BACKHOE 101

Backhoe Cylinders and Working Equipment

Backhoe Hydraulic Cylinders:
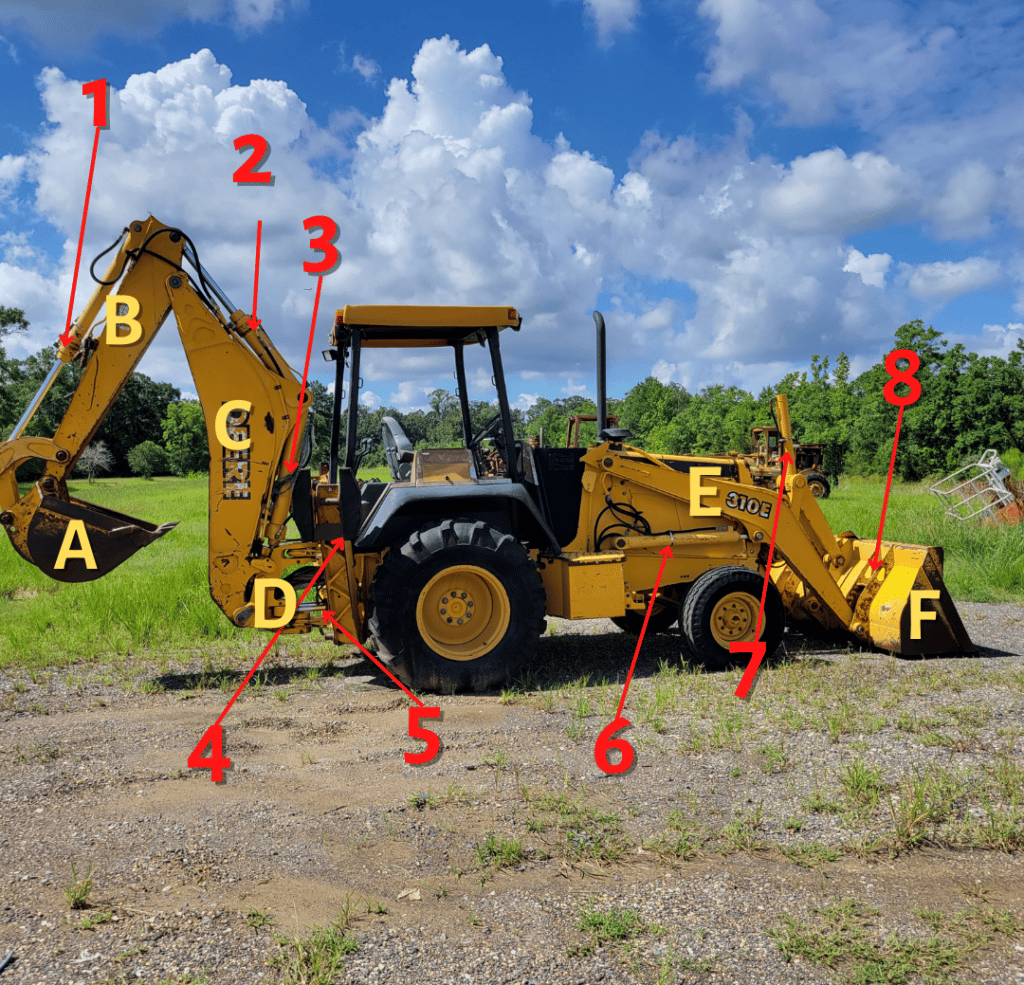
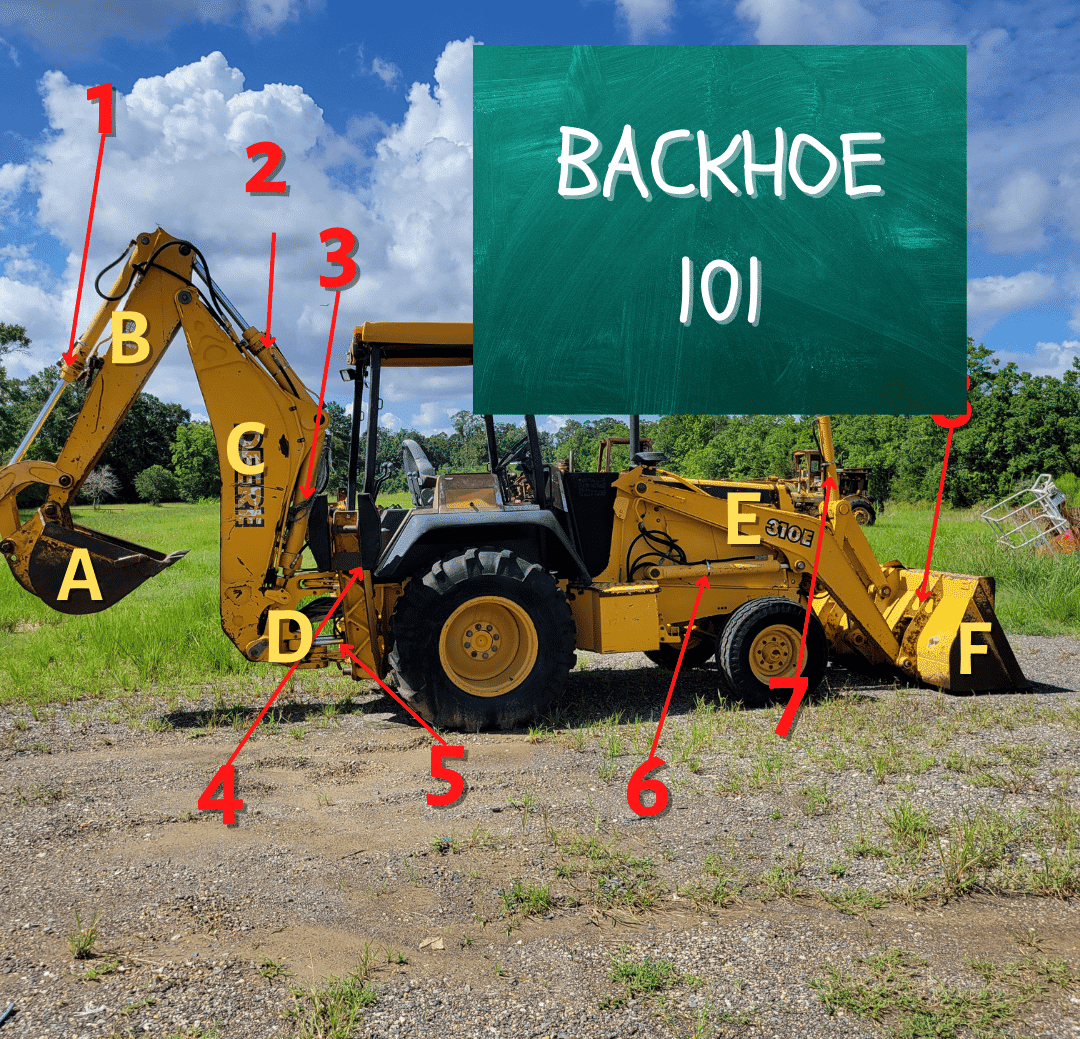
deere 310g right hand profile with numbers and letters over cylinders and working equipment

There are many names for each cylinder on a backhoe, but we’re going to give you the terms that we use, so there is no confusion when you are researching or buying parts. Each cylinder is named for the part that it manipulates. This is important to note, because the Dipper Cylinder sits upon the Boom and the Bucket Cylinder sits on the Dipper, so it can get confusing when we’re not on the same page, and mistakes cost time and money.

  1. Backhoe Bucket Cylinder (Sometimes Called the Bucket Curl Cylinder) Manipulates the Backhoe Bucket (A). Even though the majority of the cylinder is pinned to the dipper, it is named for the bucket that curls toward the machine when the ram is extended.
  2. Dipper Cylinder (Also Arm or Stick Cylinder) Manipulates the Dipper Stick (B) Again, most of the cylinder rides along the Boom, but the rod end is pinned to the Dipper and manipulates it.
  3. Boom Cylinder. Manipulates the main boom (C)
  4. Stabilizer Cylinder (Also Outrigger Cylinder). Manipulates the Stabilizer or Outrigger Arm. Side-Specific on some makes.
  5. Swing Cylinders. Manipulates the Swing Tower, or Swing Frame (D) Side-Specific on some makes.
  6. Loader Lift Cylinders. Raise and lower the Loader Frame (E). Side-Specific on a few makes.
  7. Loader Tilt Cylinder (or Loader Bucket Cylinder). Case and Ford usually have one on each side. Cat, Komatsu, and most Deere models just have one in the center. Models with two cylinders are often side-specific. 
  8. Clam-shell (or 4-in-1 Bucket) Cylinder. *Not Pictured*  Some backhoes have a loader bucket that opens and closes. If this model was equipped with a “4-in-1 Loader Bucket” the cylinders would be pinned to the back of the Loader Bucket (F)
deere 310g right hand profile with numbers and letters over cylinders and working equipment

Backhoe Working Parts

The “Working Parts” on a Backhoe Consist of the Buckets, Arms and the Frames that They are Attached to. 

I Want to be Clear About this Section, Because if Our Terminology is Mixed up on these Working Parts Mistakes Cost Even More Money and Time, Because all of these Parts Ship VIA Freight!

A. Backhoe Bucket: Pretty Self Explanatory. It Pins up to the Backhoe Links and Dipper Arm (B).

B. Dipper (Sometimes Called the Arm. NOT a Boom) Pins Up to the Backhoe Links, Bucket (A), and Boom (C).

C. Boom (NOT an “Arm, Stick, or Dipper) Pins to the Dipper (B) on one end and the Swing Frame (D) on the Other.

D. Swing Frame (Also Swing Tower). Pins to the Main Frame of the Machine. The Boom (C) is Pinned to it, and the Swing Cylinders (5) Move the Swing Frame Left and Right.

E. Loader Lift Frame (or Lift Arms). Pin to the Main Frame of the Machine, and the Loader Bucket (F)

F. Loader Bucket. Again, this one is Easy. It Pins to the Loader Lift Frame (E)
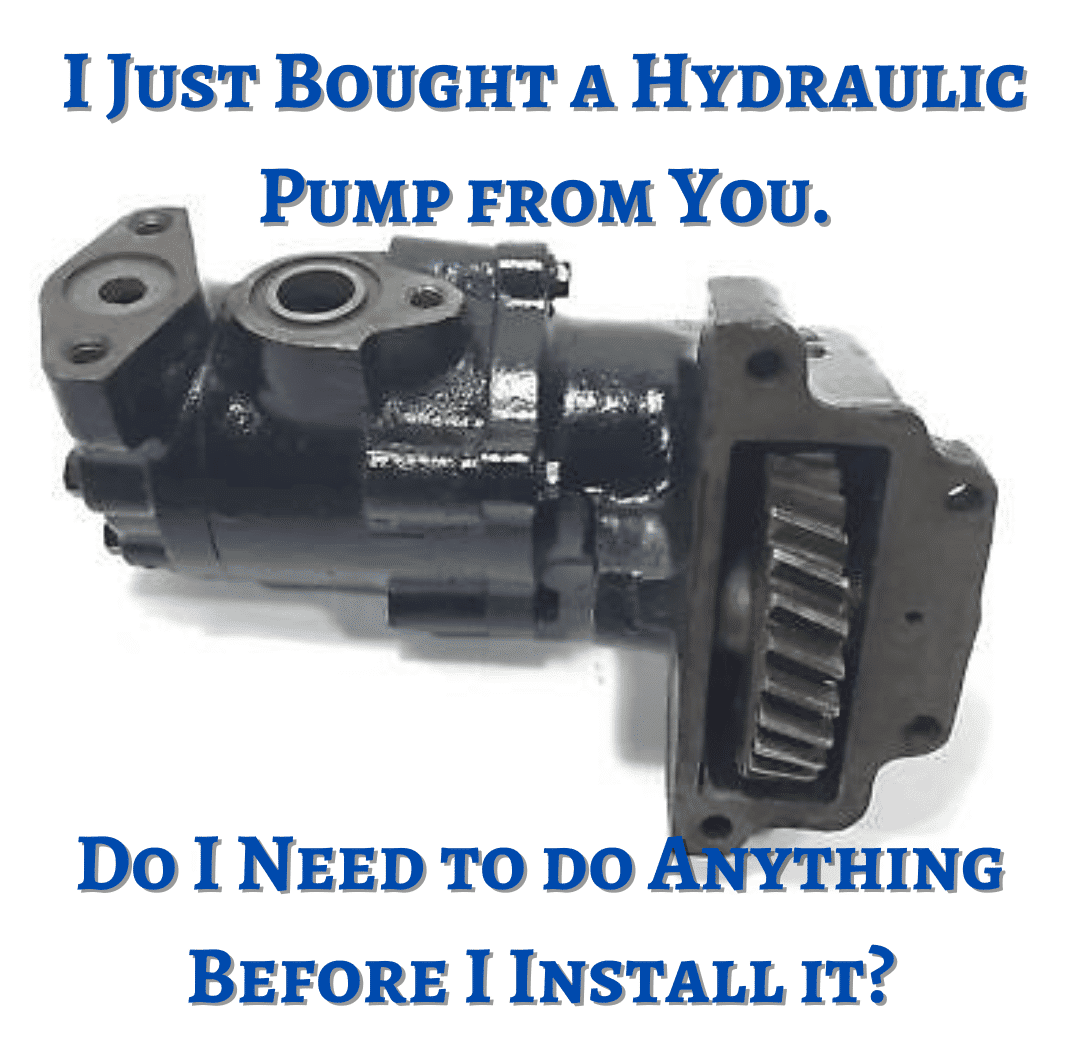
I Just Bought a Hydraulic Pump from You. Do I Need to do Anything Before Installing it?

I Bought a Hydraulic Pump from You. Do I Need to do Anything Before Installing it?

In this Section, We are Going to Make Sure that You Avoid one of the Most Common Mistakes Customers Make AFTER Purchasing a Hydraulic Pump, Drive Motor, Swing Motor, Valve Bank, or Shuttle Transmission BEFORE they Install it. *Please Note This Article IS NOT a How-To Flush Your Hydraulic System or Perform ANY Preventative Maintenance on Your Specific Type, Make, or Model of Equipment. ALWAYS Refer to the Machine Manufacturer for the Proper Instructions.*

Table of Contents

Why Did My Old Pump/Motor Fail?

This is a question that is best asked before ordering a new pump because there are a variety of factors that can cause a hydraulic pump or motor to fail. Among them are what I call the 4 main “pump killers:”


  1. Mechanical Failure to the Input Shaft: This is generally caused by an extreme load on the pump due to a problem with the pressure relief components designed to prevent overloading, or slack between the shaft and coupling causing shaft fretting.

  2. Cavitation: Simply put, the pump is starved of oil, causing a myriad of problems.

  3. Over Pressurization: Again, when pressure relief components fail or are adjusted higher than what the pump is designed to handle, gradual or catastrophic failure is imminent.

  4. System Contamination: Your hydraulic system has dozens of moving parts, and even more than hydraulic oil flows through. Over time, any of these components can wear away or corrode, leaving small particles of rubber, plastic, rust, dirt and grime, and metal shavings. If this “trash” is not flushed out, it WILL cause damage to your system, including your new pump.


You really need to determine or have a mechanic determine the exact cause of your pump failure and check the pressure relief valves, pump coupler(s), etc… to make sure that any external issue that caused your old pump to fail is addressed, so it doesn’t cause the same or worse damage to your new pump

Do I Really Need to Flush the System?

Absolutely! I will make this short and sweet. If you do not flush your hydraulic system, the contaminated oil WILL flow through your new pump. That contamination WILL cause damage. Our manufacturers and we WILL be able to tell that your system was not properly flushed beforehand, and we WILL NOT be liable for any damage to that pump, or your machine. Please don’t take the risk. Flush, or have your system flushed before you install one of our pumps or motors.

How do I Flush My Hydraulic System?

This one is simple. Please refer to the information available from the manufacturer of your machine and pump. We never want to give you inaccurate information that could cause harm to you or your property. We service our own machines according to manufacturer specs and recommend you do the same.

I Did Everything Right but the New Pump Isn't Working. What Now?

In this unfortunate instance, we need you to call us before you do anything else once it becomes apparent that your replacement pump is not working properly. Any unauthorized inspection of or any attempt to modify or repair the pump WILL void the parts warranty. While issues in the manufacturing of our pumps are few and far between, when a problem arises, it becomes our #1 priority, and we will resolve it as quickly as possible.

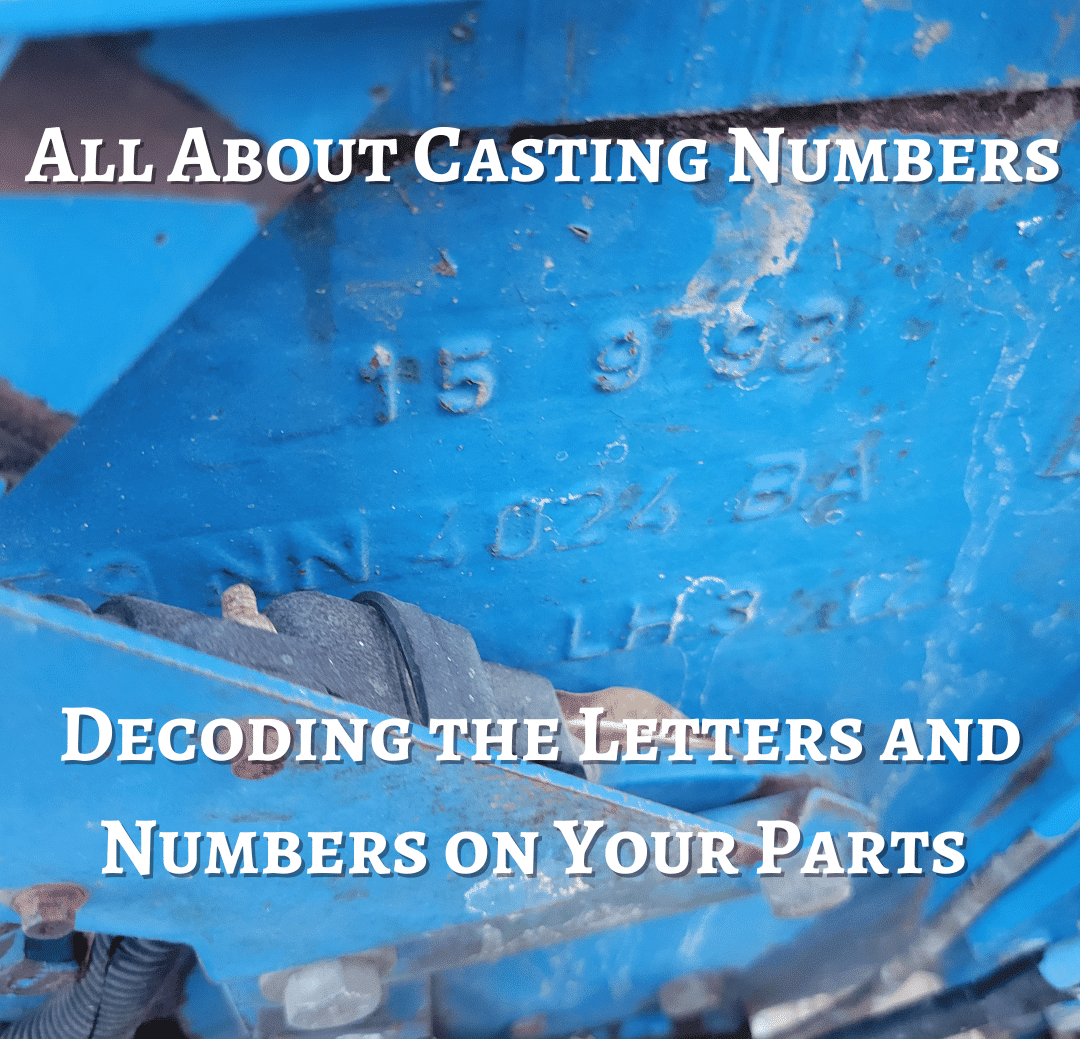
All About Casting Numbers

All About Casting Numbers

Decoding The Numbers on Your Parts

This Section Will Cover Casting and Molding Numbers Found Directly on Your Parts and How they are Not Only Helpful,
but Sometimes Required when Searching for
Tractor and Heavy Equipment Parts.

Table of Contents

What is a Casting Number Exactly?

Many tractor and heavy machinery parts are cast; meaning material such as plastic, steel, iron, or aluminum is poured into a mold before it hardens. Every part made with the same mold comes out identical to the one before and after it. Thankfully, manufacturers used numbers and letters in their molds so each one bears the same “code.” These are most commonly found on axle, transmission, or rear end housings, lift top covers, engine blocks, fuel tanks, and other non-moving parts.

Why are Casting Numbers so Important?

In almost all cases, when we are trying to verify that the part we offer will fit your machine the number on the part itself will tell us if we have a match. That is not the case 100% of the time, and we have found most of the exceptions the hard way. 


Most cast parts are heavy and have multiple dimensions to match: bolt spacing, diameter, length, thickness, height, etc… I have literally set two water pumps side-by-side and turned them every possible way I could for hours, and still couldn’t detect the difference between the two with my eyes, measuring tape, or micrometer. If only there had been a casting number on the housing, I could have avoided a frustrating learning experience, and I’m trying to help you avoid it, too.

Where Should I Look for the Casting Number?

The short answer is “directly on the part.” That is always true, but it’s not always jumping off the machine at you. Here are some common parts with casting numbers, and where to look for them:


Axle Housings: For most wheeled machines you will find the numbers from the rear of the part. Some casting numbers are on the underside of the axle.


Engine Block: Most commonly on the right-hand side of the engine. (If you would like a quick refresher, see “My Right or Your Left? How to Properly Orient Your Machine”). Make sure you are looking at the block directly because many engine components have their own numbers.


Cylinder Head: This depends on the manufacturer. Some can be found on the side of the head. Some are found on top of the head, underneath the valve cover.


Front Axle Support (Bolster): Almost always on the underside of the bolster. You either have to scoot yourself, your camera, or someone else under the machine to see it. It will also be covered in grease and grime.


Now that you know where to find some common casting numbers, I’ll tell you WHAT numbers to look for


Casting Number Format by Manufacturer:

Ford/New Holland: 

Uses numbers and letters. Ex: D4NN7006AB

Old Ford tractors (Pre 1950) Use Shorter Codes or Numbers. Ex. EAE8006B or 310665

New Holland Uses Mainly Numbers. Ex. 80067568

All Have a Similar Format, but Rarely Matches the Part Number.


Case/I.H.:

Mostly Numbers With One Letter. Ex: 81107C91, or A184267

Matches Part Numbers Less than Half the Time


Deere:

Almost all Start With a Letter Followed by Six Numbers. Ex: T151503

Matches the Part Number Almost all of the Time.


Komatsu:

Mostly Numbers Divided by Two Dashes. Ex: 20Y-30-66250

Matches Part Numbers Less than Half the Time


Caterpillar:

Seven Numbers Separated by a Dash. Ex: 117-2305, or Five Numbers with a Letter in the Second Position. Ex: 6E2426

Matches the Part Number Most of the Time.


Massey Ferguson:

Usually 8-9 Numbers Only. Ex: 37111500


Matches Part Number About Half the Time


Notable Exceptions:

There are some important things to note. Just because a casting number on a part housing matches your casting number, it does not guarantee that the entire assembly will fit. Transmissions are a good example. The casting number tells us that the housing or casing will bolt up to your machine, but the internal gears and shafts may not be compatible with yours. If the input shaft diameter, length, and/or spline count do not match, the transmission will not work.


Another notable exception is a Ford 3-cylinder tractor hydraulic pump used on thousands of 3000, 2000, and 4000 series tractors, and 172ci engines. EVERY pump assembly has the same front housing with the same casting number: C5NN905,  but there is a fitting on the rear of the pump that comes in two different styles and diameters. In this case, the casting number is not the only piece of the puzzle we need. Only the style and diameter of the rear fitting can tell us if the pump is a match.

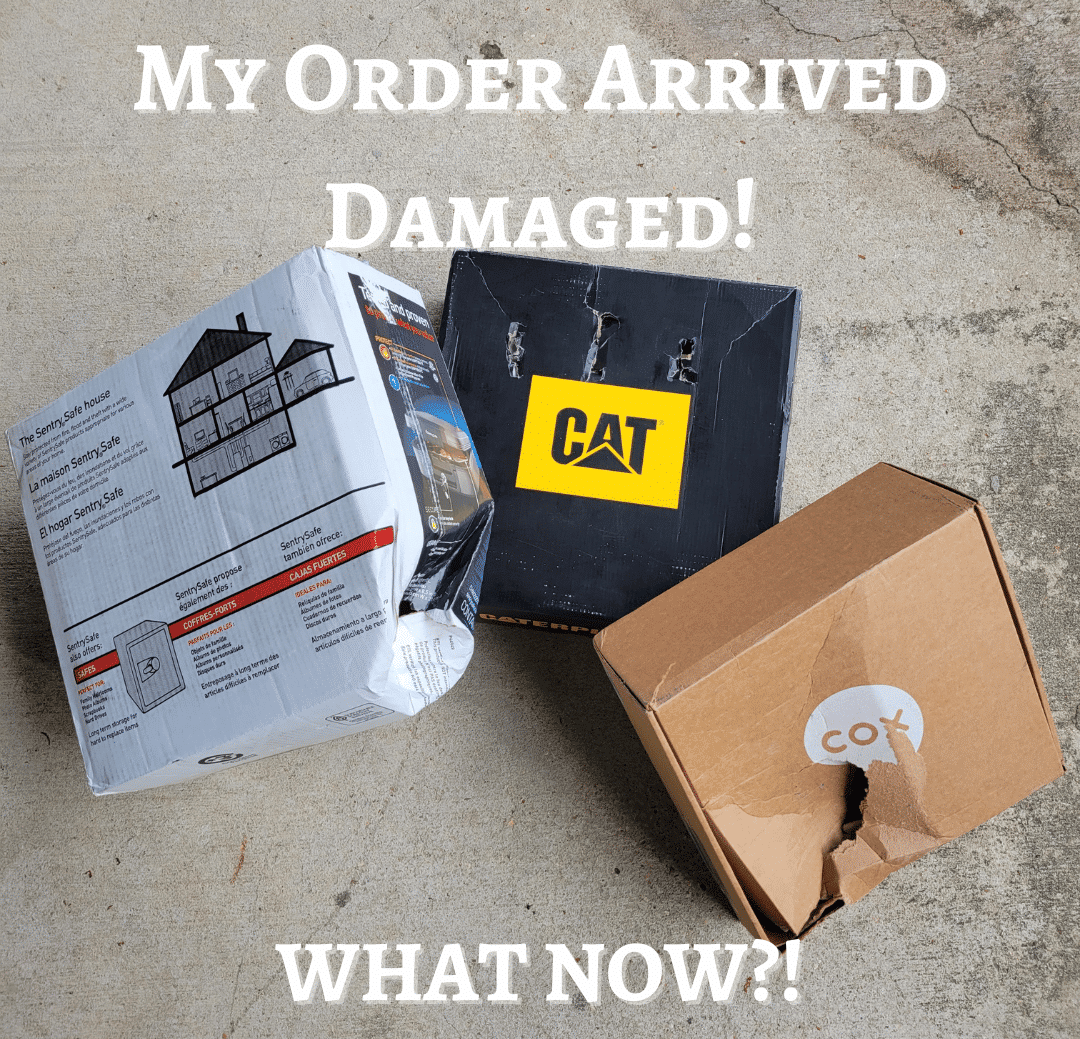
My Part Arrived Damaged! Now What?!

My Part Arrived Damaged! Now What?!

In a perfect world, all of our orders would be delivered on time, in immaculate condition, but we all know that damage is inevitable. In these cases, we do our best to make a disappointing situation as painless as we possibly can.

Table of Contents

My Part is Damaged. What’s My First Step?

That largely depends on where the carrier is, but we will cover as many scenarios as we think you may encounter.


IF THE CARRIER IS THERE, your first step is to kindly but firmly ask them to wait while you inspect the package or pallet. Delivery drivers are on a tight schedule, but they are required to allow you to check for damage. We HIGHLY recommend you, or someone you trust open ANY package that has damage to the outside of the box, crate, or whatever was used as an outer layer. If there is damage to the part, your second step is CALL US IMMEDIATELY. Take pictures with a digital camera or cell phone 


IF THE CARRIER HAS GONE, your first step is the same as the second step if the carrier was still there: CALL US IMMEDIATELY. At this point, we cannot have you send the damaged part back with the carrier, but that may not be the preferred method. Take pictures of the packaging and the damaged part. DO NOT disassemble the part any further. DO NOT try to attempt a “simple repair” like a bent fitting or crimped fuel line. If you modify the part IN ANY WAY, even if it arrived damaged, anything you do could void the warranty and be stuck with it as-is.

You are Closed and the Driver is Here. What now?


  • NEVER let the delivery driver leave until you point out the damage. Some ground carriers will insist on taking the damaged package with them, rather than leave it with you. Let them take it, and contact us the next business day. If they insist that they cannot take it back on that truck, there may be a good reason for it, but MAKE SURE the driver notes the damage in their handheld scanner or however they have to do it, and be sure to note their name.

  •  

  • NEVER sign a bill of lading for a freight shipment. Your signature will act as proof that you inspected the delivery and there is nothing wrong with it. If the freight driver will not leave the shipment (and they shouldn’t) without a signature, let them load it back onto the truck and take it to the terminal. Contact us as soon as we are open for further instructions.

  •  

  • NEVER throw away the damaged part OR the packaging that it came in unless we tell you otherwise. We may need you to send us pictures so we or our vendor can file a claim after we get your order taken care of.

How Much Longer do I Have to Wait Now?

If your part was damaged in transit, we want to get you a replacement as quickly and securely as possible. If there is stock to replace the part, we may be able to get another shipped out the same day. We usually have the part shipped via regular ground service, but in some cases, we are able to escalate the issue and have the part arrive faster than the original did. These decisions are made on a case-by-case basis. If the part you ordered is not available through the same channels as the original, we will work with another vendor or salvage partner to replace the part.

This Can’t Possibly Cost Me Anything, Right?

The short answer is no, AS LONG AS you have not attempted to repair the part in any way. As mentioned above, anything you do to a part that has arrived damaged is not the fault of the carrier and may cause them to be let off the hook for the original damage as well.


If the damage is in no way your fault, we will send a replacement out at absolutely no additional cost to you. (THIS DOES NOT APPLY if you ordered the wrong part. In those cases, you will have to pay the cost of the replacement part, shipping to you, return shipping for the wrong part ordered, and a restocking fee in most cases). Please keep any pictures of the damage handy, and DO NOT throw away the part or packaging until we tell you to do so, or give you different instructions.

What If I Order a Part I Don’t Need Right Now?

A lot of customers will order parts for their machines with the intention of installing them when they have time days, weeks, or sometimes months after they order them. There are many reasons for this, but you should always inspect your parts ASAP, even if you won’t be able to install them right away.


We recommend that any moving parts, such as pumps and gears, be installed before the warranty period has expired in case there is any issue with the function that external damage cannot indicate. You should still ALWAYS inspect the part even if it has no moving components. For example, the warehouse where about half of our new aftermarket radiators ship requires any and all damage to be reported within 7 days of receiving it.


We will do everything we are authorized to do to replace your damaged parts if you do not inspect them within the warranty period, but we CAN NOT guarantee the same outcome as if you had inspected the part upon arrival. These will be handled on a case-by-case basis.

Wow. This FAAQ Is Making Me Nervous. How Often Does this Happen?

The VAST majority of our shipments arrive at our customers’ locations with no issue. As with anything in life, if you do something enough times, there will be a problem once or twice. Thankfully, only a small percentage of the thousands of shipments we send become an issue.  We just want you to have the knowledge in your arsenal to handle them if any arise.

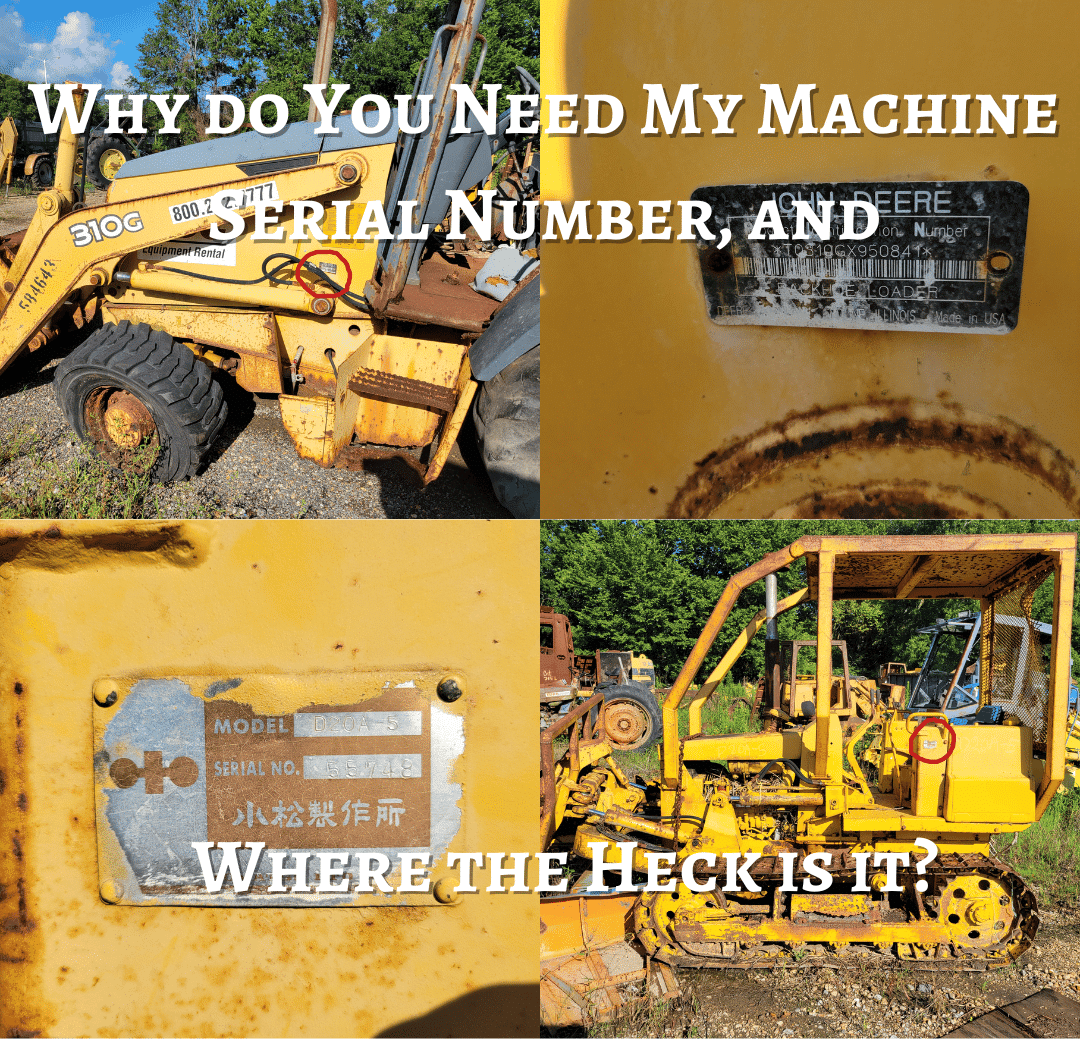
Why do You Need My Machine Serial Number and Where the Heck is it?

Why do You Need My Machine Serial Number,
and Where the Heck is it?

In this Section, We Will Tell You All About Your Machine Serial Number, Where it is, and Why We Need it Most Times You Order Tractor and Heavy Equipment Parts.

Table of Contents

I Know My Model Number. Why do You Need the Machine Serial Number?

First of all, if you know your machine make and model number, we are already off to a great start. You may be wondering how someone would own a machine and not know that. Keep in mind that a lot of tractors, backhoes, dozers, and excavators we offer pats for are often times decades old. Some of them have been passed down, inherited, sold several times, or the owner just plain forgot once the decals and paint faded that information away. But you have your model number, and you’re still being asked for your machine serial number when you call. The reason is simple. The make and model number are all you need to find a lot of parts for your machine, but for a lot of parts, we need more specific information. Before we get into exactly what that number tells us, I’ll answer the the first question I get 90% of the time I ask for a customer’s serial number:

Where Do I Find My Machine Serial Number?

I would love to have a one-sized-fits-all answer for you, but I don’t. The one element that is most common is what the serial number is printed on: a “business card sized” thin metal tag, usually attached to the machine with rivets or an adhesive. That is usually WHAT you are looking for, but your question is WHERE to find it.

Thankfully, our sales staff has access to software that will usually show them exactly where you need to look. If you have a Case, Ford, International Harvester, John Deere tractor or heavy machinery manufactured before 2010, we should be able to direct you to the serial number tag location using that software. However, if this is not the case, there are a few common locations to check first.

– On the dash, or cowling around the steering wheel or gauge cluster for tractors

– On the bottom of the side of the cab nearest the boom for excavators that swivel

– On the lift-arms or lift-frame for loaders, skid steers, and some backhoes

– Stamped onto the fuel or hydraulic tanks on some dozers and backhoes


Just as important for you to know where to start looking is where NOT to look:

– On the side of the engine, transmission, or rear-end housing of any machine

– On a pump or hydraulic motor (injection pump, hydraulic pump, skid steer motor, carburetor, etc…)

– On the final drive housing for excavators, trackhoes, dozers, etc….

There are likely more than a couple “business-card shaped” tags on your machine, and we don’t want you to make a trip out to it just to find out that you have only found your engine, transmission, or axle serial number, or your hydraulic motor or injection pump tag, and NOT your machine serial number. Those numbers are VERY important when identifying those specific components, but they aren’t the numbers you need right now.

Guess Which Tags are Machine Serial Numbers. Hover Over the Tag for the Answer.

I've Found the Correct Number. Why do You Need it?

As I’ve stated before, your make and model number does not tell us everything we need to know to find you the correct parts. Again, there is a pretty simple reason. Manufacturers don’t want to roll out a new model number every time they make a change to a machine. For example, Ford 555A and B series backhoes have high stall OR low stall torque converters depending on when the machine was made. Ford doesn’t stamp the production date anywhere on the machine, but the machine serial number can tell us when your machine rolled off the line. It is imperative that we know that because if you replace a low-stall torque converter with a high-stall, you will at best ruin your transmission. In this case, there are also markings on the actual housing, but in over seven years of personally selling dozens of those torque converters, I only came across a couple of them that still had legible markings. Our sales staff will make sure they have all of the information they need to keep you from ordering the wrong part, and our website will alert you in the product description as well.

There is NO Serial Number Tag Anywhere! What Now?

The problem with small and thin metal tags on tractors and heavy machinery is that they don’t always stay put. A lot of times, if they do stay put, they’re painted over, gouged by tree limbs, or worn away by time or a previous owner using a little too much elbow grease trying to clean it up with a wire brush. Thankfully, most manufacturers stamp the serial number on the main frame of backhoes, dozers, and especially excavators. If you strike out there, we will do our absolute best to find you the correct part by taking measurements, analyzing photos you email or text to us, and putting every available resource to use. In rare cases, when we both don’t know the machine serial number, we’ll arrange with our customer ahead of time to split the shipping if it doesn’t fit, but we don’t like to pay for extra shipping just as much as you do, so we will do everything we can to match the part before the sale.

COMING SOON: How Do I Measure a Tractor Spindle? Spend a Little Time to Save a Lot.

HOW DO I MEASURE A TRACTOR SPINDLE?
Spend a Little Time to Save a Lot!

This Section Will Save You a LOT of Time, Headache, and Money Compared to Going it Alone. This Info is Invaluable!

coming soon blog how do i measure my tractor spindles> spend a little time to save a lot!

COMING SOON: Making The Complicated Simple. What to Know Before Ordering a Tractor Clutch Kit

Making the Complicated Simple: What to Know Before Ordering a Tractor Clutch Kit.

COMING SOON! This Section Will Save you More Time and Money than You Know, if You've Never Replaced a Tractor Clutch Before. Try it Before You Read this FAAQ if You Dare!

coming soon to FAAQ making the complicated simple. what to know before ordering a tractor clutch kit

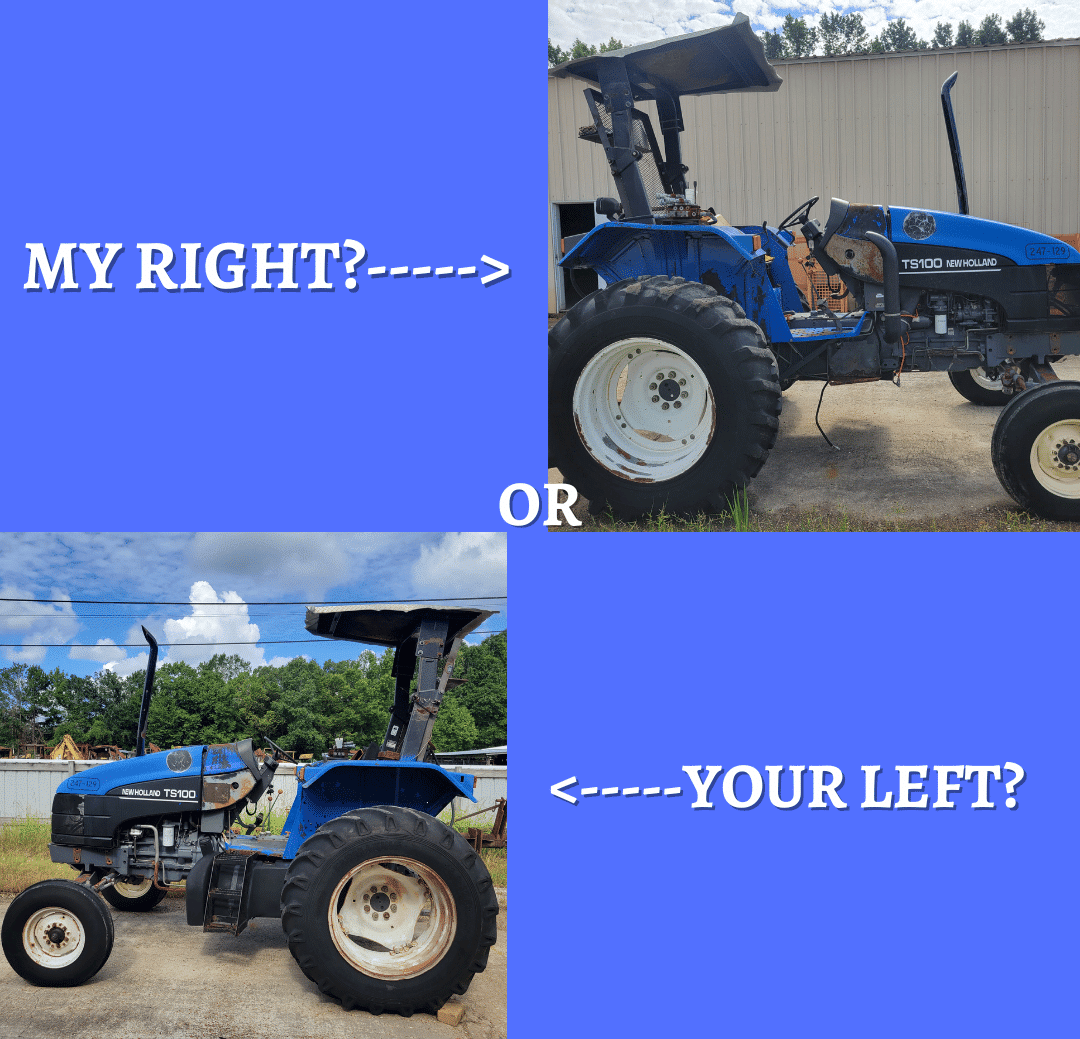
MY RIGHT OR YOUR LEFT? How to Orient Your Machine

My Right or Your Left? How to Orient Your Tractor or any Machine Before Ordering Parts.

This section will cover a seemingly unimportant topic, but if you and your sales staff member are not on the same page, it can cost you time and money. We will show you how to tell the left of your tractor, backhoe, excavator, dozer, skid-steer, etc..
the correct (not the “right”) way.

This is the Left Side of My Tractor, Right?

First, it’s best to use the word “correct” when asking or confirming that the customer or the salesman is “right” when describing the orientation of your machine. It’s a small change, but it can avoid a lot of confusion. A lot of parts are “side-specific”, meaning the same part on the left-hand side of your machine will not fit the right-hand side of the same. For example, engine side covers are cut differently to fit the left or the right side. You can likely imagine the way your machine tapers from the back to the front of the hood. The right-hand cover will not fit the left side unless your tractor is perfectly square.

Which is the Correct Way to Orient My Machine?

Think about your automobile. If a tire is flat, and you needed to describe which one, you would use the words front, rear, driver’s side, and passenger side. As you well know, most heavy machinery and tractors are not passenger vehicles (unless you count a kid taking a ride on grandpa’s knee). In this case, you need to know which side is left and right.


The easiest way I’ve found over the years is to ask our customers to picture themselves in the operator’s seat driving the machine forward. I intentionally avoided saying “sitting in your seat”, because nearly all backhoe seats swivel or flip over, so the operator is facing the digging bucket.


With that in mind, imagine you’re in the seat AND driving forward. Your body AND your backhoe are now facing the same direction. Your right is the right-hand side of the machine, and your left is the left-hand side of the machine. This is the orientation that you need to use.

Is it Really that Simple?

The answer is yes UNLESS you are operating an excavator or another machine that swivels on its frame. In this case, everything above the swing bearing is still oriented the same way your body is, BUT the frame and undercarriage may be the complete opposite if you are not facing the “front.”  In this case, I will ask the customer to swing the machine so that the drive motor and gears are behind them.


In an excavator the “front” of your undercarriage is where the idler wheel and track tensioner are, the “rear” is where your final drives and sprockets are.

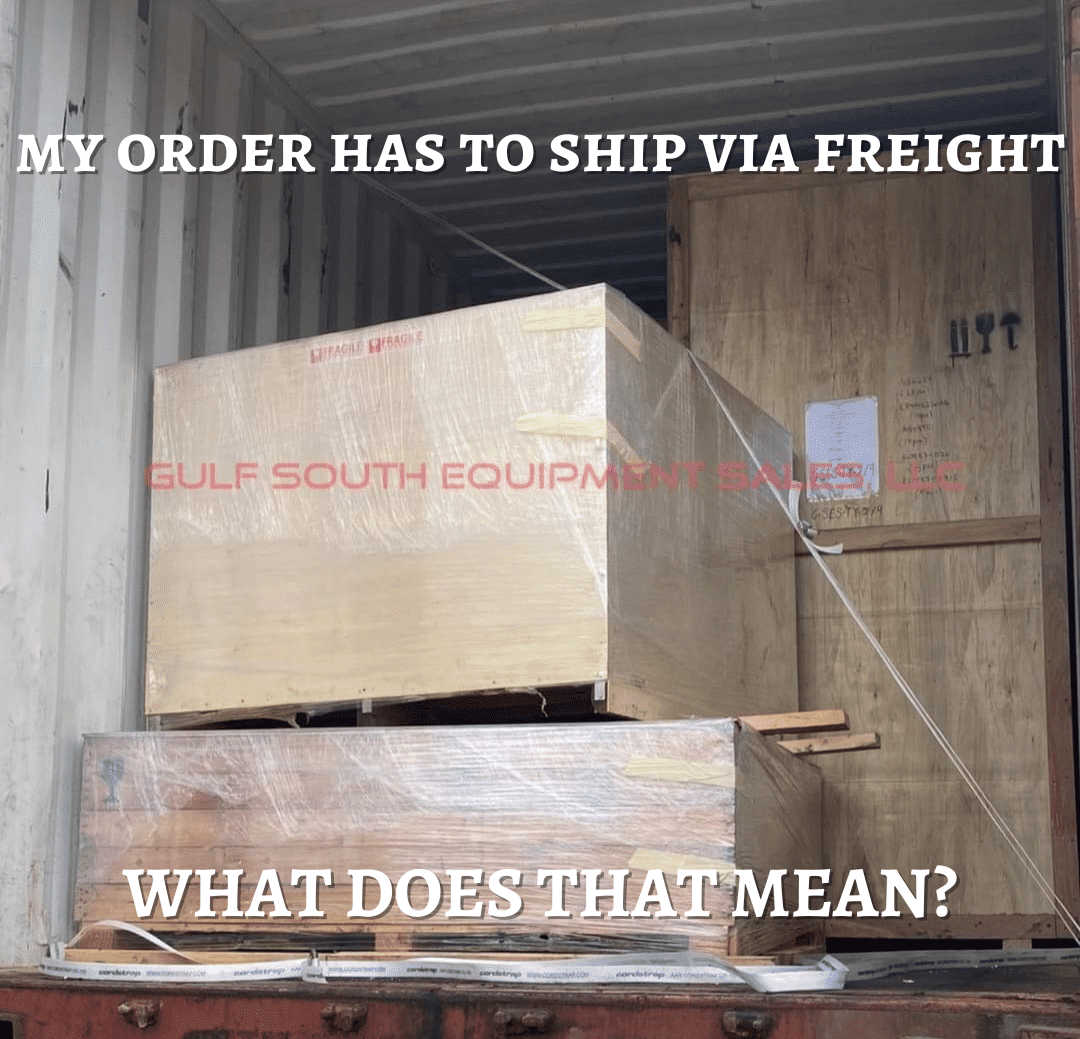
My Order Has to Ship Freight. What Does That Mean?

My Order Can Only Ship Freight. What Does That Mean?

In This Section We Will Cover all the Important Questions You Have About Shipping Your Parts Order on a Freight Truck. We Will Give You the Why, When, How Much, How Long, and What You Can do to Make the Process as Painless as Possible.

Why Can’t UPS or FedEx Ground Deliver it?

UPS is the most common carrier for ground shipping in our industry. They will NOT accept shipments exceeding 150 pounds, and more than 5’ in length, depth, or height.


Most orders for tractor or excavator glass are not shipped via UPS, because you are more likely to receive a bag of tempered glass shards than an intact windshield. For the same reason, some parts that are not made of glass and weigh less than 150 pounds will also not be shipped on a UPS truck. When parts arrive damaged, it creates a headache for everyone involved, and we avoid them at all costs.

What Parts Have to Ship Freight?

As I mentioned above, most glass MUST ride on a freight truck, but some will brave the UPS journey. Anything over 150 pounds, or with too many delicate components on the outside will have to ride freight. If any part has to ship via freight, it will be noted in the part description, and you will not be able to place the order online.

How Long Will it Take?

Typically freight shipments take 1-2 business days longer than ground shipping, but you are often given the option to pay for a quicker lead time. Once the product has been picked up from wherever it is shipping, we will send you the name of the freight carrier and a PRO number. You can search that number just like a UPS tracking number on the carrier’s website.

What is Freight Shipping Going to Cost Me?

Just like any package you mail or send via UPS or any other ground carrier, the price depends on distance, weight, and dimensions. It also depends on where it is coming from. We get regular freight traffic at our office in Baton Rouge, Louisiana, but some of our parts ship directly from our vendors who ship so much, their costs are even lower. Either way, we are able to shop several major carriers, and can offer some of the cheapest freight shipping in our business.


For example, a 4-cylinder Cummins 4T390 engine weighs about 500 pounds and will fit on a standard 40 x 40 x 6 inch pallet. Freight shipping to business with a loading dock, or a forklift to unliad the truck in the lower 48 States, within 100 miles of a metropolitan area averages $300.


That’s a lot of qualifiers, which brings you to your next question:

How Can I Get the Cheapest Rates?

If you do not own a physical building in a commercial zone with a loading dock or a forklift, find someone who does and will let you have your parts shipped there!


In all seriousness, that’s the most effective way, because the freight company will charge $80 or more to deliver in a residential area, assuming the semi and trailer can get to the address, and at least another $80 to lower the part onto your driveway using a lift-gate. Of course, if the tractor-trailer can get to your location and you’re willing to pay for those additional services, we can have your parts shipped to your house, or directly to your job site.

Do I Have to Be Present When the Truck Arrives?

No, but we highly recommend it! Someone has to sign for the delivery, and if it’s best if it is you. We realize your time is essential, and we can’t always offer you a tight time frame, but we can request that the driver contact you approximately 30 minutes before they will arrive. If you can be on-site, it will save you a lot of potential headaches, and here’s why:


If you or someone who knows what they’re looking for are not there when the truck is unloaded, there may be damage to the parts or packaging, and entire pieces of your order may be missing. While we and our vendors do our best to package and prepare freight to make it to you in good order, issues do happen. If there is a problem with your order when it arrives, the absolute best time to take care of it is before you sign the paperwork on the driver’s clipboard. If we are open, call us! We may have you return the item on the very same truck if necessary. If we are not open, and there is a problem, refuse the shipment and call us the next business day so we can tell you exactly how we will proceed.

Any and All Other Freight Questions:

CALL OR EMAIL US! We have been shipping parts in a variety of ways to tens of thousands of destinations. We can make your freight shipping experience as painless as possible, and we are happy to answer any question you can think of to help all of us achieve that.

What is a Core and Why am I Being Charged?

What is a Core and Why am I Being Charged?

Core charges and conditions vary so it’s worth your time to understand what these and other terms mean before purchasing a part that requires a core deposit, or is sold in “exchange.”

What is a Core, and Why Am I Being Charged?

Simply put, your broken or malfunctioning part, typically an assembly of some kind, is the “core” in “core charge.” I’ve sold used parts since 2013, and I don’t know why it’s called a “core,” but that’s not important. Your money and your time are important, and we want to save you both.


A core charge is a deposit you pay upfront that is refunded once we receive your broken part, so long as any core conditions have been met. There are methods that you can employ to avoid a core deposit in some situations, and there are some parts that we will not sell without a reasonable guarantee of a usable core in return.

Why Do You Want My Junk?


The short answer is it’s worth something to us. Your need for a working part and our desire for your broken one is mutually beneficial. For example, if your backhoe shuttle transmission is not working, it’s MUCH faster and cheaper to buy the complete assembly with the torque converter from us and have it installed in a day instead of paying a mechanic to remove it and rebuild and reinstall yours. In return, we get a rebuild-able core that we can sell as-is, have refurbished, or keep on hand.

How Much is This Going to Cost Me?

The core charge is determined by many factors. Some parts are so difficult to find in working or rebuildable condition, that the core deposit is equal to or greater than the price of the part itself. There is no set cost for each type of part, and the charge may change over time, largely dictated by the law of supply and demand. Not all core charges are Non-negotiable, but some cannot be avoided. Some common core charges are $350 for a rebuilt torque converter to fit a Ford 555D or Case 580K Backhoe. In general, torque converters can be rebuilt by a skilled mechanic as long as the housing is not compromised. So in that case, you will pay the $350 deposit when you order the part, and once our rebuilder inspects your core housing, we refund that $350 back to you. Once all is said and done, it will cost you $0 as long as any and all core conditions are met!

What Are Core Conditions?

Core conditions are the terms under which we will accept your broken part. In other words, there are some parts that are “too broken” for us to accept as a core. On the other hand, there are some cores we want back regardless of the condition. As with the amount of the core deposit, the core conditions are determined by a number of factors, similar to those listed above. 


When there are specific conditions that your core must meet, they will be listed in the product description on our page. 


Some rebuilders have a sliding scale depending on exactly what components are use-able, meaning they will inspect a core engine or transmission, and refund you in full or partially depending on what components are not rebuild-able. While it’s understandable that a company would structure its core conditions this way, we try to avoid these conditions if at all possible.


If you have ANY questions, please call us, and we will be happy to explain further. Again, cores can be complicated, and effective communication is the best way to make sure all parties involved understand each other.

What if I Don’t Have a Core?

For many parts, if you do not have a core, we will simply charge the core deposit with a note on the sales receipt stating that you do not have a core, and we are selling you the replacement part “outright.” In that case, the core deposit is not refunded.


There are some parts that we CANNOT sell outright. These parts are either so scarce, or we use a rebuilder that does not allow it because their business depends on being able to rebuild and re-sell them.


Some rebuilders have a sliding scale depending on exactly what components are useable, meaning they will inspect a core engine or transmission, and refund you in full or partially depending on what components are not rebuildable. While it’s understandable that a company would structure its core conditions this way, we try to avoid these conditions if at all possible.


There are some cases where we will offer partial credit if a core does not meet the conditions laid out by our sales staff. For example, we may charge a $500 core deposit for an engine. If there is a hole in the block, we may offer $300 back or we may work out another deal. Not all core conditions are inflexible.


As I mentioned earlier, some parts cannot be sold unless there is a reasonable guarantee that we will get a rebuildable core back. Of course, there are situations where a customer will buy a tractor missing some parts to fix up. That’s one way to get a great deal on it, but you should do some research into just how difficult it is to locate the missing parts before you pull the trigger. Again, in some cases, it is simply not possible to sell you a replacement part without a qualifying core, given the scarcity of the part. 


I’ll give you an example, so you won’t get stuck with a great deal on a 1-ton lawn ornament. The Ford New Holland compact series, including the 2-cylinder 1500 is a powerful machine on a small frame. They will last for generations AS LONG AS you are careful not to run the engine too hot, or you will likely crack the cylinder head. If that happens, the best-case scenario is to buy a rebuilt head for $1,250 + a $750 core charge and shipping one way. If you have luck like me, that head will crack in the one place it cannot be repaired and even good used ones are either not available to buy outright, or are extremely expensive.

How Does My Core Get to You?

In the great majority of cases, we will pay to get your core back to us. For small parts, we can simply have UPS pick it up from you, or we can send you a pre-paid label through the mail, to your e-mail, or in the box with your replacement. Freight gets a little more complicated because we have to schedule a time for pick up and get a copy of the bill of lading over to the pick-up location via email or fax, but it’s not prohibitively inconvenient.


In some cases, you are responsible for the cost to get your core to us. IF YOU ARE, we will make sure you are aware of that before you make the purchase, and there are ways that our shipping and freight discounts can lower your return shipping costs.


We will often ask you to write an RMA (Returned Goods Authorization) number on the outside of the box, directly attached to the core itself, or on a copy of the invoice that we send you. These instructions are essential and will be communicated clearly to you. The time it takes to process your core refund depends on it, which brings me to your next question.

How Long Will My Core Refund Take to Process?

Once again, I don’t have a one-size-fits-all answer for you, but I will give you a good idea. As always, our sales staff can give you the most accurate lead times on a case-by-case basis.


Some cores are picked up from you and sent back to our rebuilders. We regularly tack these and follow up with our vendor to check the status of your return. It can take several business days once the core is received to be inspected, depending on the volume.

Cores shipped directly to us tend to be processed much quicker. We are able to inspect the cores and process your refund within one business day.


We can refund your core deposit directly back to your credit or debit card, but keep in mind that once the refund is done on our end, your bank or lender may take additional time before the funds are available to you. That is beyond our control. We are also happy to mail you a company check if you prefer.

Can I Buy a Part Exchange Without Paying the Core Charge Up Front?

Yes. You absolutely can, but you will need to get your core to us before we can ship your replacement part. In this scenario, you are responsible for the cost to get that core to us or our rebuilder. In that case, if your core meets all conditions, you will not be charged when we ship your replacement part to you.


If you do not see the answer to your question in this article, please call our sales staff at 1-800-462-8118. We are always happy to answer any of your questions before you make your purchase. We believe an ounce of prevention prevents a pound (or in our business, TONS) of headache. Give us a call today!